Training HybridNet
First make sure you have the HybridNet Pytorch Library installed as described in this Section.
You should be able to activate the Anaconda environment by running
and then launch the GUI web-interface with This should open the following window in your browser: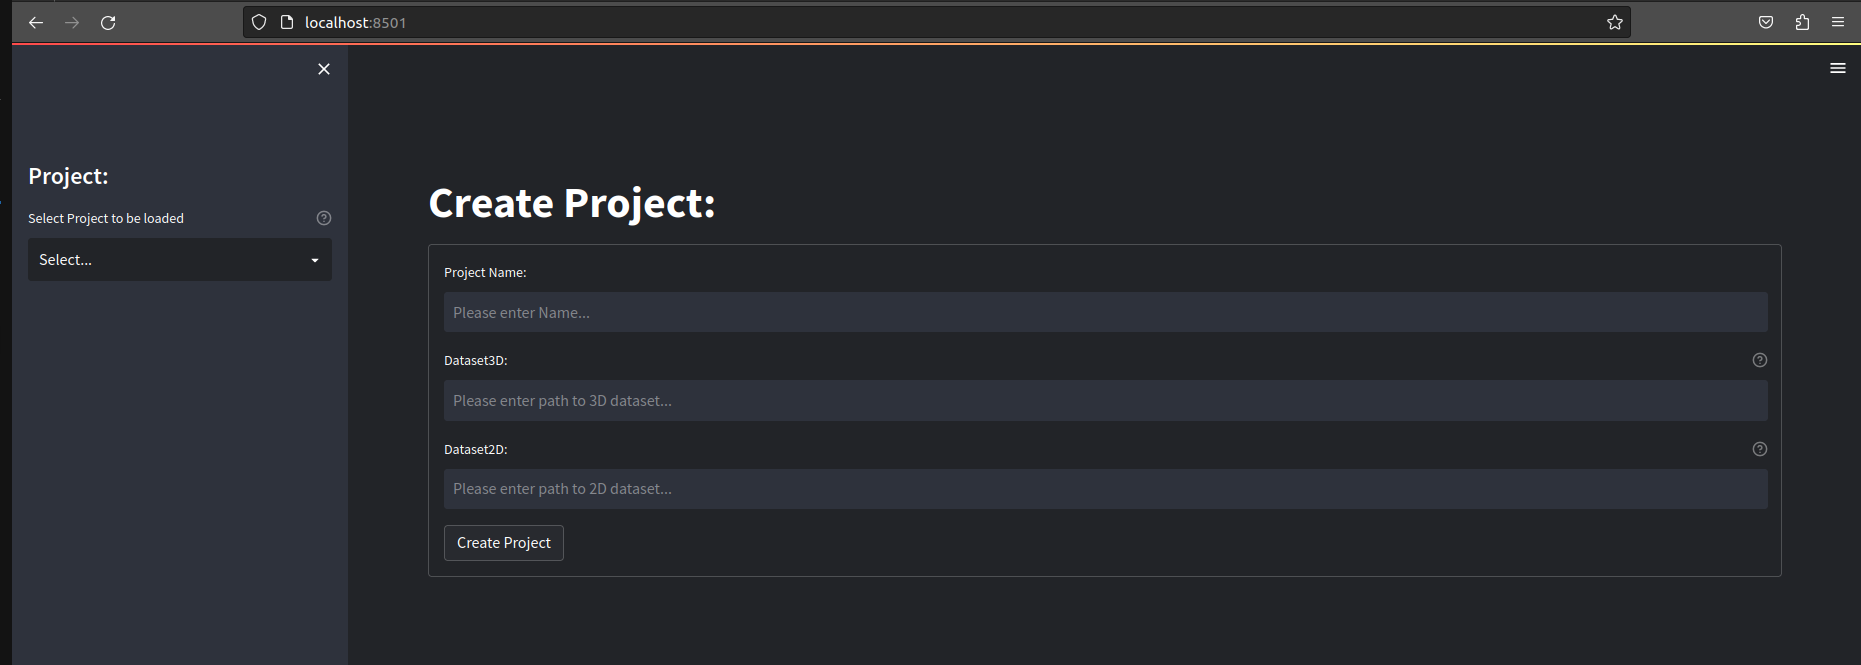
From here you have two options:
- Create a new Project by entering a project name and the path to a TrainingSet you have exported with the AnnotationTool (Sorry for the inconsistent naming scheme!). You can use the same path for Dataset3D and Dataset2D for all usual usecases.
- To check that everything is created correctly switch to the Visualization Tab and then play around with Visualize Datasset 2D/3D to see that all the markers are in the expected locations and the 3D reconstruction looks reasonable.
- New projectes are saved in the projects drirectory in the root JARVIS-Hybridnet directory
- Load an existing Project by selecting it in the dropdown on the right. An example Project is provided to familiarize yourself with the interface.
After either creating or loading a project you should see the following:
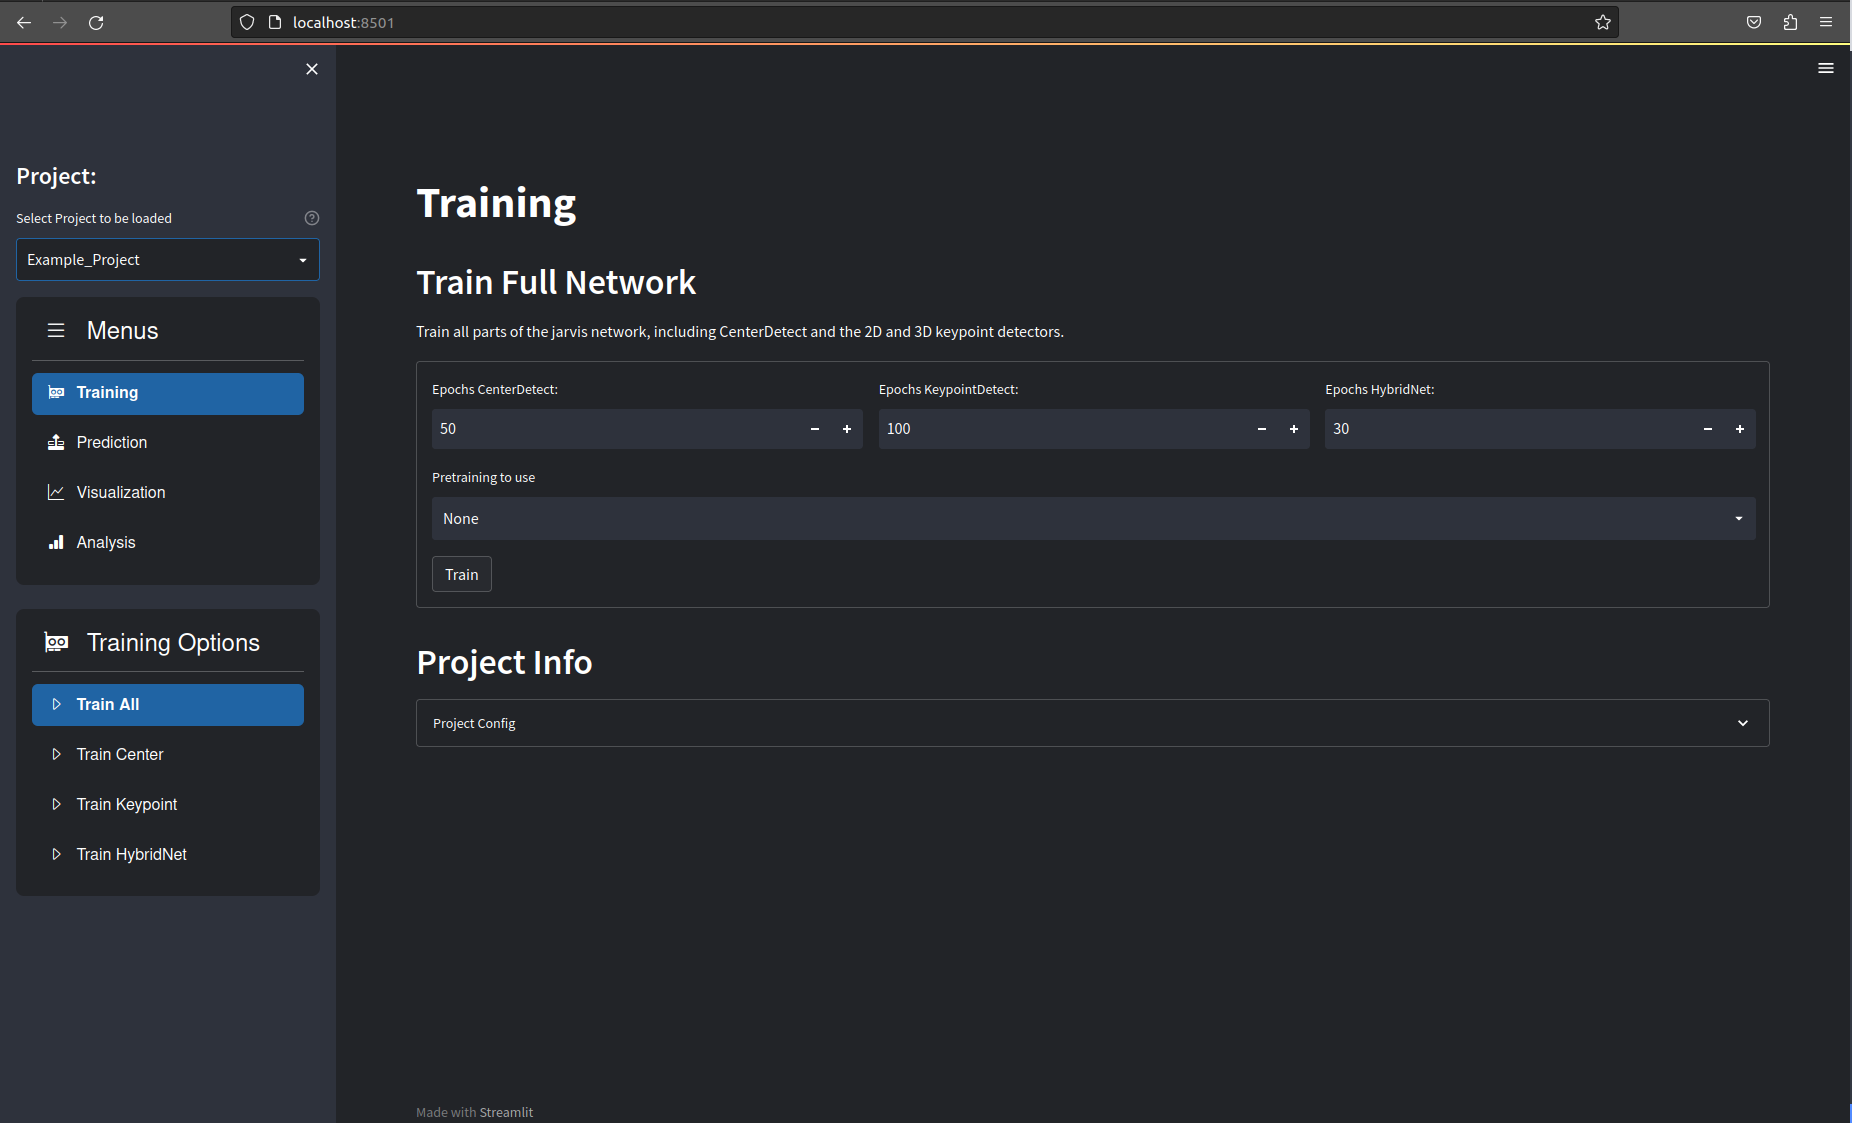
Training
The first step after creating your project is training the different neural networks. You have a couple of options here:
- Train All: This trains all parts of the HybridNet architecture in sequence. It is strongly recommended to use this function, with default parameters, to train your networks intially. If this works and you get reasonable results you can use the projects
config.yamlfile to fine tune the parameters if you want to. - Train Center: Trains the CenterDetect network. This is the first step in the tracking pipeline and is used to detect the center of your tracking subject.
- Train Keypoint: This trains the 2D keypoint detection network. This can be used on its own to detect keypoints in individual images.
- Train HybridNet: This trains the 3D-CNN that is the final stage of the tracking pipeline.
Use the three individual training options only if you know what you are doing.
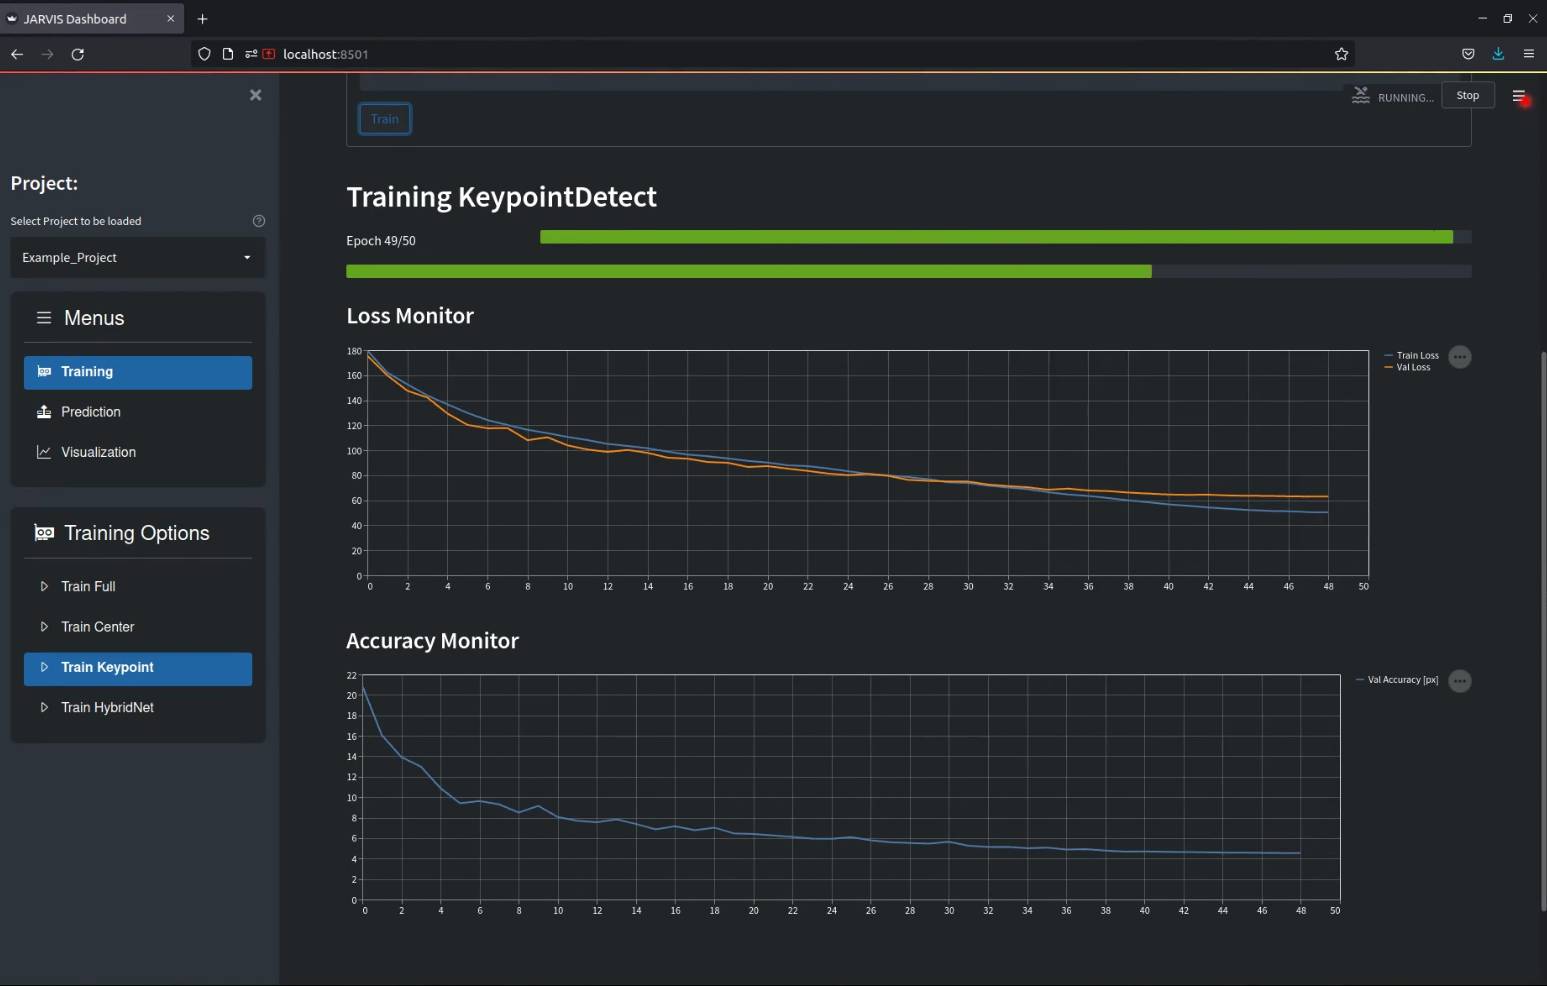
Training will take anywhere from a few minutes to a few hours, depending on your dataset size and hardware. The interface should display updating loss-curves that shoudl look similar to the image below.

Tensorboard logs are saved the logs directory for every training run, models are saved in the models directory.
Prediction
The next step is to use your trained networks to predict the poses in one of your recordings. Select the Prediction tab and fill in the following details:
-
Path of recording directory is the path of the recording you want to run prediction on.
-
Weights for CenterDetect / HybridNet lets you specify which weights you want to use. If you have trained models yourself you can leave them at latest. If you didn't train the network yourself you will have to put the path of the pretrained weights here. They can be found in the pretrained directory inside your JARVIS-Hybridnet folder.
-
Start Frame & Number Frames lets you select which part of the recording you want to run the prediction. For quick results set 'Number of Frames' to 1000. To predict until the end of the recording set it to -1.
Once you're done you can run the prediction by clicking the Predict button.\ Once the process is finished you will find a directory with a current timestamp in the projects folder under predictions. That folder contains a 'data3D.csv' file that contains the 3D coordinates and their corresponding confidences for every point in time. The directory also contains a .yaml file that holds some information necessary for creating videos from your predictions.
Dataset3D file format:
- The unit of the entries in the
data3D.csvis mm - The reference coordinate frame is relative to your primary camera.
- The
confidencecolumn has a number between 0 and 1, where one presents max. confidence. This metric is pretty flawed, so use carfully.
Visualization
Navigate to the Visualization tab. Here the correct prediction directory should already be selected. If you want you can remove or add cameras from the list of cameras for which you want to create annotated videos. You can now click Create Video as shown below. If everything is set correctly you should find a directory containing your freshly labeled videos in the project directory after the progress bar is filled up.
Analysis
If you want to compare the quality of different training runs in more detail the functions inside the Analysis tab are very helpfull.
Setting the config parameters
Jarvis tries to derive a reasonable set of config parameters by analyzing your trainingset. This is not always perfect though and you will often find yourself modifying the config.yaml inside your project directory. This section aims to describe and illustrate all the non self-explanatory parameters.
#General Configuration
DATALOADER_NUM_WORKERS: 4 #Number of threads used for dataloading
#Dataset Configuration
DATASET:
DATASET_2D: Example_Dataset #2D dataset path (usually same as DATASET_3D)
DATASET_3D: Example_Dataset #3D dataset path
#EfficientTrack 2D Center Detector Configuration:
CENTERDETECT:
MODEL_SIZE: 'small' #Can be 'small', 'medium' or 'large'
BATCH_SIZE: 8 #Set to 4 for very small datasets (<500 Frames)
MAX_LEARNING_RATE: 0.01 #Max learning rate in OneCycle schedule
NUM_EPOCHS: 50 #Set to 100 for very small datasets
CHECKPOINT_SAVE_INTERVAL: 10 #Saves a .pth checkpoint ever N epochs
IMAGE_SIZE: 256 #Frames get resized to NxN
#EfficientTrack 2D Keypoint Detector Configuration
KEYPOINTDETECT:
MODEL_SIZE: 'small' #Can be 'small', 'medium' or 'large'
BATCH_SIZE: 8 #Set to 4 for very small datasets (<500 Frames)
MAX_LEARNING_RATE: 0.01 #Max learning rate in OneCycle schedule
NUM_EPOCHS: 100 #Set to 200 for very small datasets
CHECKPOINT_SAVE_INTERVAL: 10 #Saves a .pth checkpoint ever N epochs
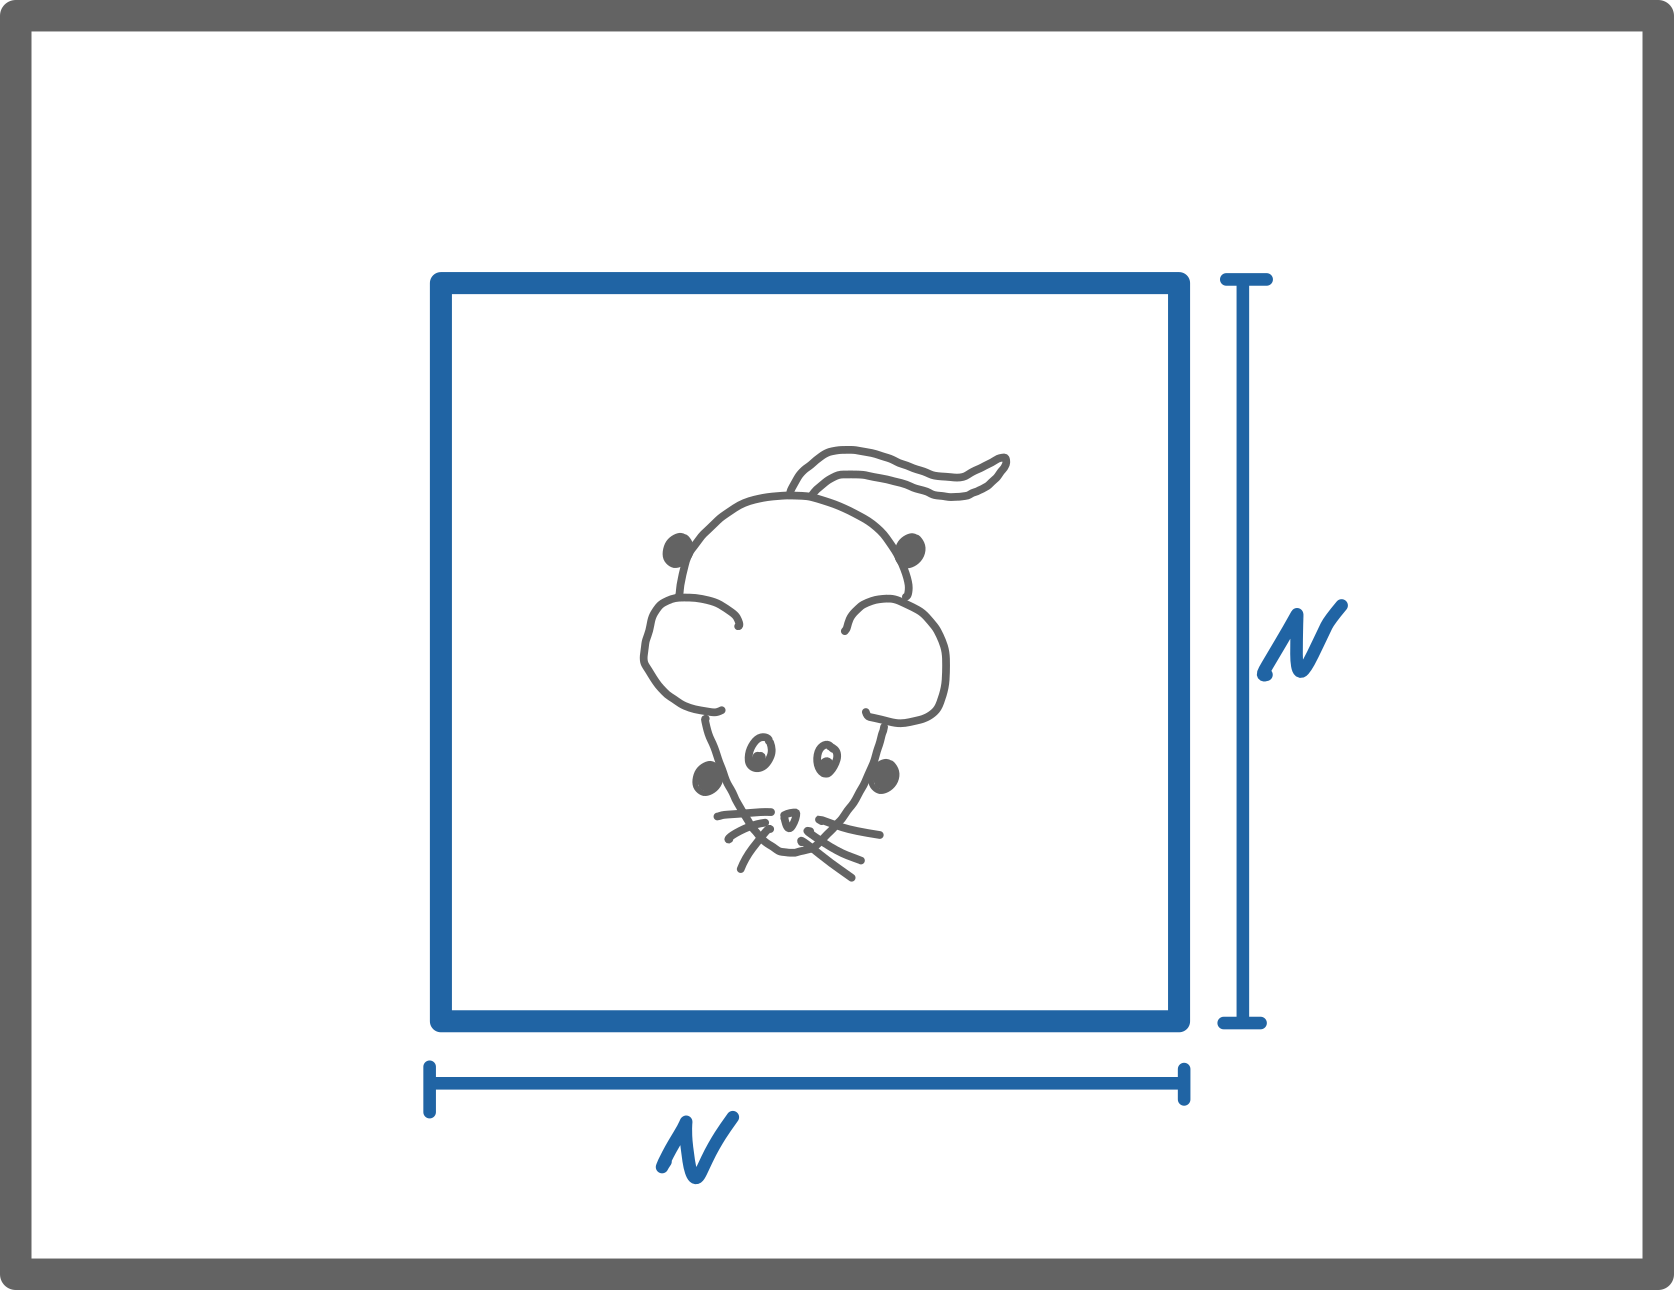
BOUNDING_BOX_SIZE: 256 #Size of the crop around the subject that gets
# fed into KeypointDetect (1)
NUM_JOINTS: 23 #Number of keypoints (Don't change!)
#hybridNet Configuration
HYBRIDNET:
BATCH_SIZE: 1 #Currently only batch size 1 is supported
MAX_LEARNING_RATE: 0.003 #Max learning rate in OneCycle schedule
NUM_EPOCHS: 30 #Set to 60 for very small datasets (<500 Frames)
CHECKPOINT_SAVE_INTERVAL: 10 #Saves a .pth checkpoint ever N epochs
NUM_CAMERAS: 12 #Number fo cameras (Don't change!)
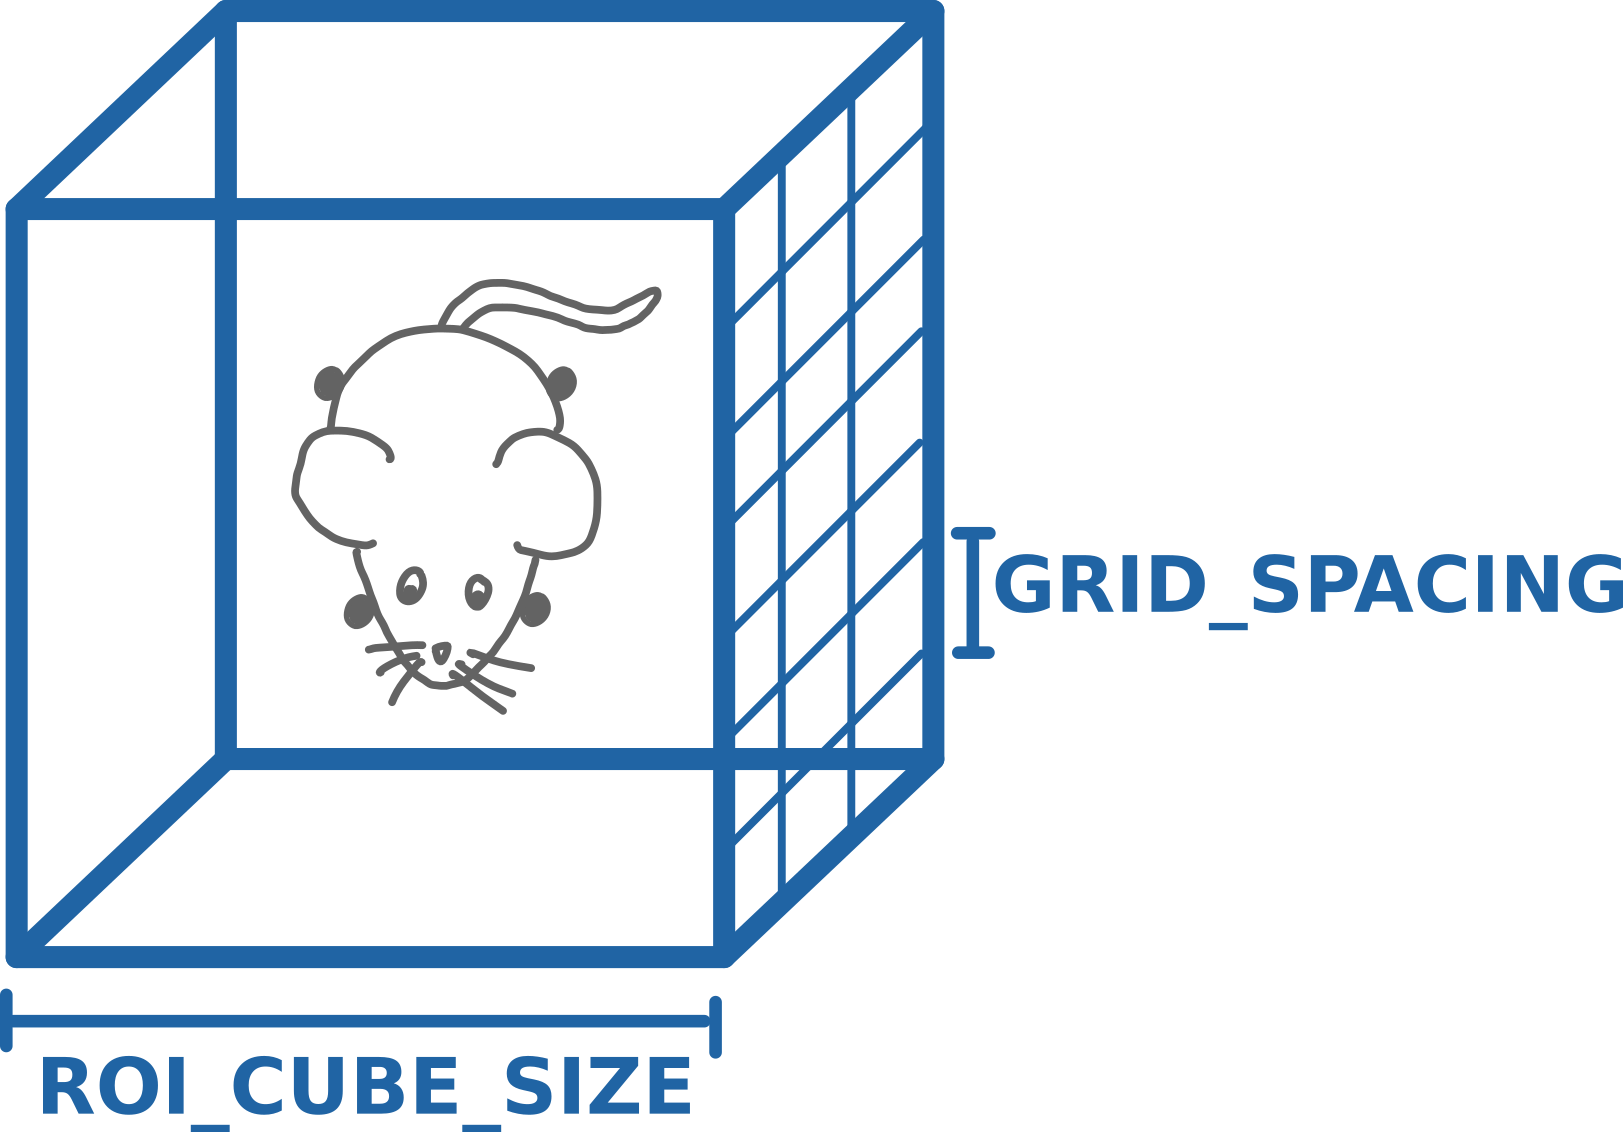
ROI_CUBE_SIZE: 144 #Size of the 3D bounding box in mm (2)
GRID_SPACING: 2 #Resolution of the 3D bounding box in mm
KEYPOINT_NAMES: #List of all keypoint names (for visualization)
- Pinky_T
- Pinky_D
...
SKELETON: #List of all joints (for visualization only)
- - Pinky_T
- Pinky_D
- - Pinky_D
- Pinky_M
- - Pinky_M
...